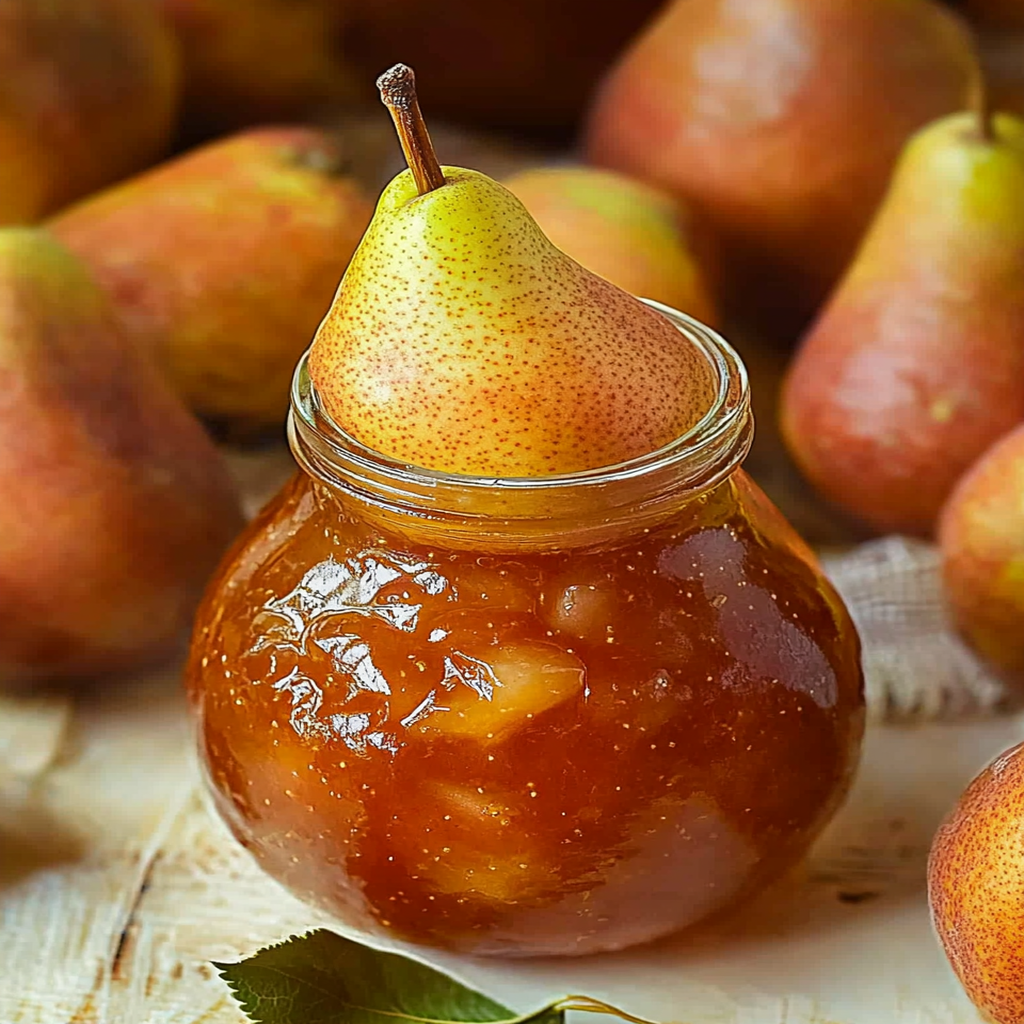
There?s something magical about the smell of sweet, ripe pears bubbling away on the stove, filling the kitchen with a warm, inviting aroma that begs you to take a taste. The moment you spread homemade pear preserves over your morning toast, it’s like a hug from an old friend?comforting, familiar, and oh-so-delicious. add pear preserves to oats If you?ve ever wondered how to capture that essence in a jar, this pear preserves recipe is your golden ticket.
Jump to:
- Ingredients for pear preserves recipe
- How to Make pear preserves recipe
- <strong>Perfecting the Cooking Process</strong>
- <strong>Add Your Touch</strong>
- <strong>Storing & Reheating</strong>
- FAQs :
- What ingredients do I need for the pear preserves recipe?
- How long do homemade pear preserves last?
- Can I use other fruits in my pear preserves recipe?
- What are some serving suggestions for pear preserves?
- Conclusion for pear preserves recipe :
- 📖 Recipe Card
Picture this: it?s a chilly autumn afternoon, and the leaves are dancing to the ground. You?re cozied up in your favorite sweater with a cup of tea in hand. Suddenly, you remember last week?s farmer’s market haul where those perfectly ripe pears caught your eye. You can already taste the sweetness as you embark on this preserving adventure that will bring joy not just now but throughout the winter months.
Why You'll Love This Recipe
- This pear preserves recipe is incredibly easy to follow; even novice cooks can master it in no time.
- The flavor profile is a delightful mix of sweet and tangy that elevates any breakfast or dessert.
- Vibrant golden pears create a stunning visual appeal in jars that are perfect for gifting or enjoying yourself.
- These preserves are versatile enough for spreading on toast or topping off desserts like ice cream or yogurt.
Ingredients for pear preserves recipe
Here’s what you’ll need to make this delicious dish:
- Fresh Pears: Choose ripe pears like Bartlett or Bosc for their natural sweetness and softness when cooked.
- Sugar: Granulated sugar helps balance the tartness of the fruit and aids in preservation.
- Lemon Juice: Freshly squeezed lemon juice adds acidity and prevents browning while enhancing flavor.
- Cinnamon Sticks: Optional, but these add warmth and spice to your preserves.
The full ingredients list, including measurements, is provided in the recipe card directly below.
How to Make pear preserves recipe
Follow these simple steps to prepare this delicious dish:
Step 1: Prepare Your Pears
Begin by washing your fresh pears thoroughly under cool running water. Once they?re nice and clean, peel them using a vegetable peeler?because nobody wants fuzzy bits in their preserves! Cut them into quarters, remove any seeds, and chop them into bite-sized pieces.
Step 2: Get Mixing
In a large pot, combine the chopped pears with sugar and freshly squeezed lemon juice. If you’re feeling adventurous (and I encourage you to feel adventurous), toss in those cinnamon sticks for an extra layer of flavor! Mix everything together until the sugar starts to dissolve.
Step 3: Cook Down
Place your pot over medium heat and bring it to a gentle simmer. Stir frequently as your mixture starts bubbling away; watch as those pear pieces soften and break down into gooey goodness! This should take about 20-30 minutes.
Step 4: Check Consistency
Once you notice that the mixture has thickened nicely?think smooth but still chunky?it’s time for a taste test! If it’s sweet enough for your liking (and trust me, it will be), remove it from heat. If you want it thicker, continue cooking for another few minutes.
Step 5: Jar It Up
Carefully pour your hot pear preserve into sterilized jars while still warm (but don?t burn yourself). Seal them with lids immediately. As they cool down, listen closely for that satisfying ?pop? sound?it means they?re sealed tight!
Step 6: Enjoy
Transfer jars to a cool place away from direct sunlight. Let them sit for at least 24 hours before indulging so flavors can meld beautifully together. Once opened, enjoy within two weeks?and trust me; it won?t last much longer than that!
Now that you’ve created this delightful pear preserves recipe masterpiece, imagine spreading it over buttered toast or dolloping it onto yogurt?a culinary dream come true! You just turned simple ingredients into something extraordinary that?ll have everyone asking for seconds…or thirds!
You Must Know
- This delightful pear preserves recipe transforms ordinary pears into a sweet, sticky treasure.
- Perfect for spreading on toast, topping desserts, or just enjoying straight from the jar.
- Homemade preserves offer unmatched flavor and satisfaction, making it an essential skill for any home cook.
Perfecting the Cooking Process
Start by prepping your pears: peel, core, and chop them into bite-sized pieces. Combine the pears with sugar and lemon juice in a large pot. Cook slowly over medium heat, stirring occasionally until the mixture thickens to your desired consistency.
Add Your Touch
Feel free to enhance your pear preserves recipe! Add spices like cinnamon or ginger for warmth. You can also mix in other fruits such as apples or cranberries for a unique twist that tantalizes your taste buds. For more inspiration, check out this cinnamon pear walnut crumble recipe.
Storing & Reheating
Once cooled, store your pear preserves in sterilized jars. Keep them sealed in the refrigerator for up to three weeks or process them in a water bath for shelf-stable storage. Reheat gently on the stove if you prefer warm preserves.
Chef's Helpful Tips
- For perfect pear preserves, always use ripe but firm pears to avoid mushiness.
- Stir constantly towards the end of cooking to prevent sticking.
- Don?t skip sterilizing jars; it ensures safety and longer shelf life.
The first time I made this pear preserves recipe, my friends went wild over it at brunch! They kept asking for more jars like I was some sort of fruit magician. It felt amazing to share something homemade that brought everyone joy!
FAQs :
What ingredients do I need for the pear preserves recipe?
To make a delicious pear preserves recipe, you’ll need ripe pears, sugar, lemon juice, and pectin. Choose fresh, flavorful pears for the best results. The sugar helps in preserving the fruit and enhancing its sweetness. Lemon juice adds acidity and balances the flavors while also aiding in preservation. sweet and spicy sauces Pectin is crucial for achieving that perfect jelly-like consistency. Gather these ingredients before you start cooking to ensure a smooth process.
How long do homemade pear preserves last?
Homemade pear preserves can last up to one year when properly canned and stored in a cool, dark place. Once opened, they should be refrigerated and consumed within a few weeks. Always check for signs of spoilage before using your preserves. If you notice any off-smells or mold, it?s best to discard them. Proper sealing during the canning process is essential for maximizing shelf life.
Can I use other fruits in my pear preserves recipe?
Yes! While this article focuses on the classic pear preserves recipe, feel free to experiment with other fruits like apples or quinces. Mixing different fruits can add unique flavors and textures to your preserves. Just remember to adjust sugar levels as needed since some fruits are sweeter than others. refreshing infused water ideas This creativity can lead to delightful combinations, enhancing your preserves’ taste while still maintaining that lovely pear base.
What are some serving suggestions for pear preserves?
Pear preserves are versatile and pair beautifully with various foods. Spread them on toast or pancakes for breakfast, or use them as a topping for yogurt or oatmeal. They also make an excellent accompaniment to cheese boards, especially with creamy cheeses like brie or goat cheese. For dessert lovers, consider drizzling them over ice cream or adding them as a filling in pastries or cakes to elevate your sweet treats.
Conclusion for pear preserves recipe :
In summary, making a pear preserves recipe involves simple ingredients like pears, sugar, lemon juice, and pectin. This delightful spread brings out the natural sweetness of pears while providing versatility in serving options. With proper storage techniques, your homemade preserves can last up to a year! Don’t hesitate to get creative by mixing in other fruits as you craft your own signature blend. Enjoy this sweet treat in various dishes throughout the year!
Did You Enjoy Making This Recipe? Please rate this recipe with ⭐⭐⭐⭐⭐ or leave a comment.
📖 Recipe Card
PrintPear Preserves
- Total Time: 45 minutes
- Yield: Approximately 16 servings 1x
Description
Pear preserves are a delightful way to savor the essence of fresh, juicy pears in a sweet and tangy spread. This simple recipe transforms ripe fruit into a luscious treat, perfect for spreading on toast or enhancing desserts. With the inviting aroma of simmering pears wafting through your kitchen, you’ll create a comforting addition to your pantry that brings warmth and joy throughout the winter months.
Ingredients
- 2 lbs fresh ripe pears (like Bartlett or Bosc), peeled and chopped
- 1 cup granulated sugar
- 1/4 cup freshly squeezed lemon juice
- 2 cinnamon sticks (optional)
Instructions
- Prepare your pears: Wash, peel, core, and chop them into bite-sized pieces.
- Mix ingredients: In a large pot, combine chopped pears with sugar and lemon juice. Add cinnamon sticks if desired.
- Cook down: Heat over medium heat until simmering, stirring frequently for 20-30 minutes until thickened.
- Check consistency: Taste and adjust sweetness if necessary; cook longer for thicker preserves.
- Jar it up: Pour hot preserves into sterilized jars, seal tightly, and let cool.
- Enjoy: Store in a cool place for at least 24 hours before using.
- Prep Time: 15 minutes
- Cook Time: 30 minutes
- Category: Dessert
- Method: Cooked
- Cuisine: American
Nutrition
- Serving Size: 2 tbsp (30g)
- Calories: 60
- Sugar: 12g
- Sodium: 0mg
- Fat: 0g
- Saturated Fat: 0g
- Unsaturated Fat: 0g
- Trans Fat: 0g
- Carbohydrates: 15g
- Fiber: 1g
- Protein: 0g
- Cholesterol: 0mg